
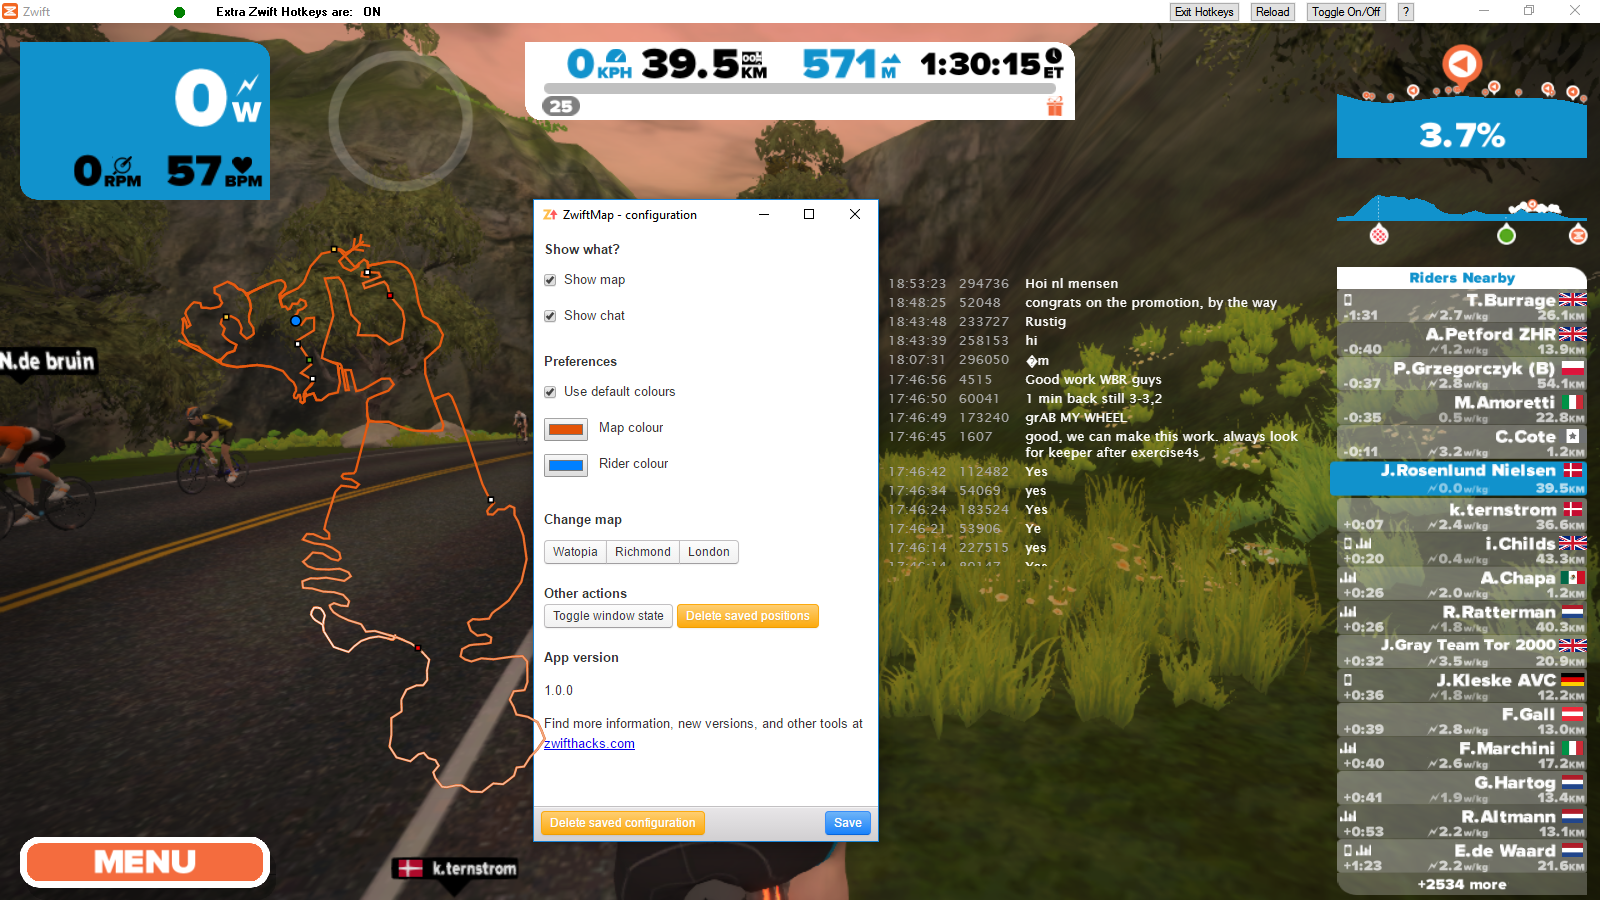
Version 1.0.0 is a major update with more features:
- There is a new main window for configuration and activating/deactivating windows.
- There is a new chat log window (a transparent overlay).
- You can choose if you want to see the map and/or the chat log. This configuration can be changed via the configuration window, and can be saved so it is remembered the next time you run ZwiftMap.
- The map and chat windows can be resized by pulling on their bottom and right borders.
- Window sizes and positions are saved between sessions. The saved positions can be deleted via the configuration window if you want a fresh start.
- There is a button in the configuration window to toggle window state (same effect as the magic key combo).
- You can override the default colours for the map and the rider marker. The chosen colours are remembered between sessions if you save the configuration.
- You can manually override which map is shown (Watopia, Richmond, or London) from the configuration. You can also just start ZwiftMap before Zwift because it then will detect from the Zwift log file which course is loaded in Zwift and switch to the correct map.
- The map is now styled in a way which should make it nicer to look at. Altitude is indicated by the colour of each road segment (most clearly seen in the Watopia map — the other courses have much less altitude variations).
- Accepts a command line argument (–window) to have the map shown in a normal window. This window can be captured by streaming software such as OBS Studio.
Other possibilities with this new version (probably not needed by most users):
- Style the map with a user.css file. Save your styling as user.css in Documents/zwift/zwiftmap
Feedback is welcome
I would love to hear from you. Please leave questions and feedback as comments to this post.
Download, install, start, and stop…
Download and install the application.
Start the installed application.
Minimise the configuration window to only see map and/or chat log.
Exit the application by closing the configuration window (in Windows) or by selecting Quit in the menu (in macOS).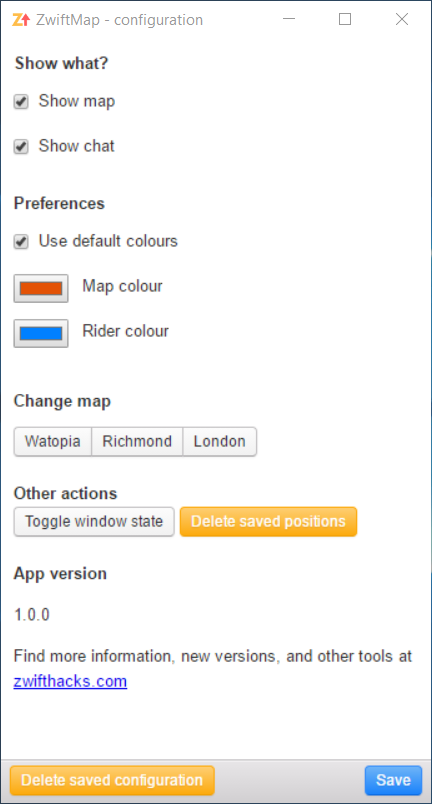
Related posts
Small changes in ZwiftMap (macOS and Windows)
What about the old ZwiftMap for Windows?
The old ZwiftMap Classic for Windows is still there but more or less all its features have now been ported to the new ZwiftMap. I currently expect to update ZwiftMap Classic with the upcoming London extension and the Volcano climb but nothing further than that. It may even come to the point where I simply retire ZwiftMap Classic when the next extension comes out.
Downloads
Download “ZwiftMap (macOS)” zwiftmap.dmg – Downloaded 62799 times – 166.03 MBmd5 checksum: 02b3382b3a910f523f6fdbb6498a22fd
Download “ZwiftMap (Windows)” setup-zwiftmap-2.2.2.exe – Downloaded 60069 times – 64.13 MBmd5 checksum: 1d243f602e23724222c052f3426d2779


This is a really great addition to Zwift, one comment though, it’d be good if you could change the type size in the chat window, it’s just too small to read from the bike on my screen. J
Until this feature gets added you can customise it yourself. See how at Tips & Tricks: Customise the chat log in ZwiftMap.
Thanks, this is a very nice and needed addition to Zwift. I was wondering if you can add an option to use a custom background for each route. I use this app on my second monitor and if I can change the background of the map I can make Q sheets and additional information as a picture to display with the map.
This is already possible but just not documented until now! Take a look at Tips & Tricks; Customise the background in ZwiftMap
Regards,
Jesper
You are the MAN……
Thanks, I will try it today.
I spend a load of time last night making a cool background for my London loop and it start to look super cool. Thanks again.
I hate to ask, but here it goes. You gave us access to change the color of the line and the marker. do you have a hack to change the width and/or make it transparent.
You can try the following in your user.css file:
g.roads .roadline { /* the width of the road (default is 2800) */ stroke-width: 6000px !important; /* colour (here set to transparent) */ stroke: transparent !important; } g.roads .roadsegment { /* width of individual segment drawn on top of roadline (default 2000) */ stroke-width: 3000px ! important; /* colour */ stroke: blue !important; }Thanks It works like a charm.
Suggestion: You could highlight some strava segments on the map (i would suggest the “…(zwiftblog verified)” segments.
How do you “stay” signed in to Zwift from the ZwiftMap – configuration screen? Using Mac OS X version, I am able to sign in just fine. But as soon as I click the red X to close the ZwiftMap – Configuration window it appears to sign me out… should I just minimize the configuration window during each session??
Yes, just minimise the configuration window.
Why do I not see this overlay on Zwift? Doing something wrong…
I assume that you have installed ZwiftMap from the download and theb launched both Zwift and ZwiftMap but cannot see the ZwiftMap overlay.
Make sure that you run Zwift in window mode and not fullscreen mode.
You may also try to start Zwift first and then ZwiftMap but it really shouldn’t matter.
I’m not sure how others use the chat overlay but for me the more important parts are the time and chat message. It would be good if the order of the columns were changed from Time-Zwift ID-Chat text to Zwift ID-Time-Chat text so that i can push the Zwift ID off the left side of my screen to only see the time and chat text. Love your work!
oh hang on, disregard that, i just remembered that when i log in the zwift id changes to the persons name, Facepalm lol